Editorial Disclosure: This article may contain affiliate links. We may earn a commission if you make a purchase, at no extra cost to you. Additionally, this content was drafted with the assistance of AI technology, but has been rigorously reviewed, fact-checked, and edited by our editorial team to ensure accuracy and quality.
Hey everyone! I’m Adnan from The Insurtech Guide. Imagine the worst happens—a fire, a flood, or a theft at your home. You’re safe, but your valuables are gone. Now, your insurance company asks you for a list of everything you lost. Could you, right now, list every important item from memory, along with its exact make, model, and what you paid for it?
I asked myself that question a while ago, and the honest answer was a hard no. I realized that without proper proof, I would be in a terrible position if I ever had to file a major claim. The burden of proof is on you, the policyholder.
Thankfully, the days of relying on dusty paper receipts are over. Modern InsurTech apps have made this process incredibly simple. In this guide, I’ll show you the exact, step-by-step method I used to document valuables for an insurance claim right from my smartphone. Trust me, your future self will thank you for this.
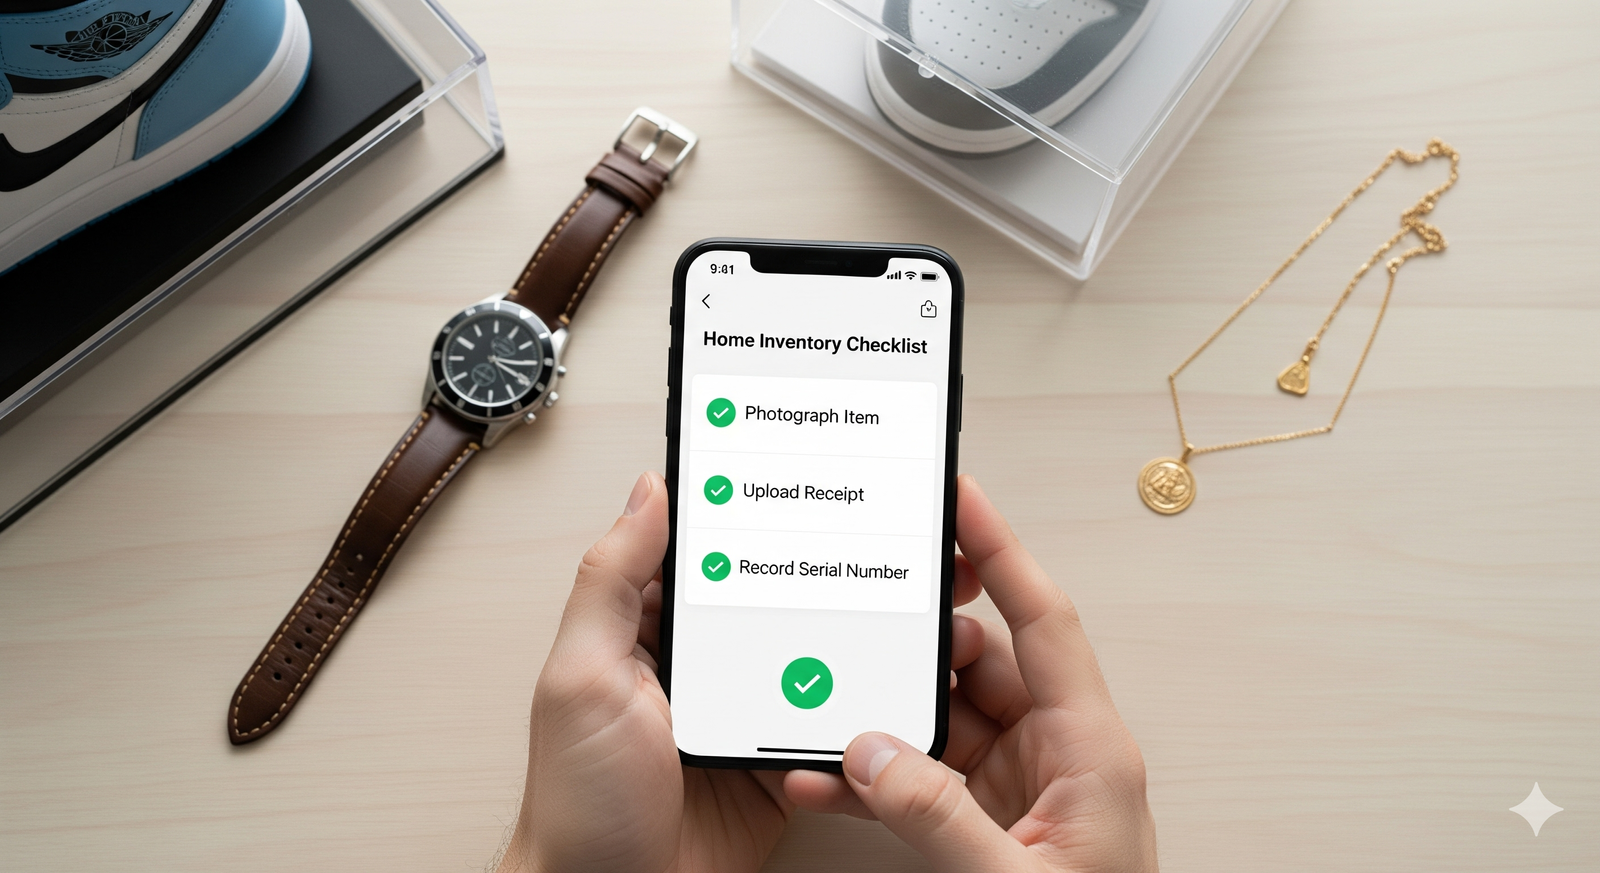
Table of Contents
Why a Simple List Isn’t Enough
Before we get to the “how,” it’s crucial to understand why this is so important. When you file a claim, your insurance company’s job is to verify your loss. If you just say “my expensive TV was stolen,” they will likely pay out the absolute minimum value for a generic TV. But if you can prove you owned a “65-inch LG C2 OLED 4K TV, purchased in 2023 for $1,800,” your chances of getting the full replacement value are dramatically higher. Good documentation is the key to a fast and fair payout.

The Modern Way to Document Valuables for an Insurance Claim
While you can use a spreadsheet, I’ve found that using an app is far superior. Many InsurTech insurers (like Lemonade) are building inventory tools right into their main app. Alternatively, you can use a dedicated home inventory app.
Why an app is better:
- It’s on your phone: You can walk around your house and add items easily.
- Photo and Video Support: You can attach visual proof directly to each item.
- Cloud Storage: Your inventory is saved securely in the cloud. If your phone and computer are destroyed in a fire, your list is still safe.
How to Document Your Valuables: My 4-Step Guide
Here is the simple and organized process I followed. I recommend setting aside a couple of hours on a weekend to do this.
Step 1: Go Room by Room
Don’t try to document everything at once; you’ll get overwhelmed. I found the best way is to tackle one room at a time. I started with my home office, which has the most electronics, and then moved to the living room. This keeps the process manageable.
Step 2: Capture the Four Key Pieces of Information
For every valuable item (think anything over $100), you need to capture four key things. This is the most important part of how to document valuables for an insurance claim.
- A Clear Photo: Take a picture of the item, showing its condition.
- A Detailed Description: In the app, add the make, model, and a brief description. (e.g., “Sony PlayStation 5, Disc Edition”).
- The Serial Number: For all electronics, appliances, and high-end items, take a clear photo of the serial number. This is non-negotiable proof of ownership.
- Proof of Value: This is your most powerful evidence. You can use:
- Receipts: The best option. I used my phone to take pictures of my paper receipts and uploaded screenshots of my email receipts.
- Bank/Credit Card Statements: If you’ve lost the receipt, a statement showing the purchase can work.
- Appraisals: For jewelry, art, or rare collectibles, a professional appraisal is essential.

Step 3: Make a Quick Video Inventory
Here’s a pro tip I learned: once you’ve cataloged the individual items, do a quick video inventory of each room. Walk slowly through the room with your phone, narrating as you go. For example: “This is the living room. Here is my Samsung Frame TV, my Bose soundbar…” This video provides powerful context and is easy to do.
Step 4: Ensure Everything is Backed Up
The final step is to make sure your inventory is safe. If you’re using a good home inventory app, it will automatically back up to the cloud. If you are doing it manually, save your photos, videos, and list to a secure cloud service like Google Drive or Dropbox.
By following these steps, you create an undeniable record of your possessions. If the worst should happen, you’ll be fully prepared to file a claim with confidence and get the money you deserve.


Leave a Reply